Yacht Stainless
Steel Rigging Inspection and Replacement
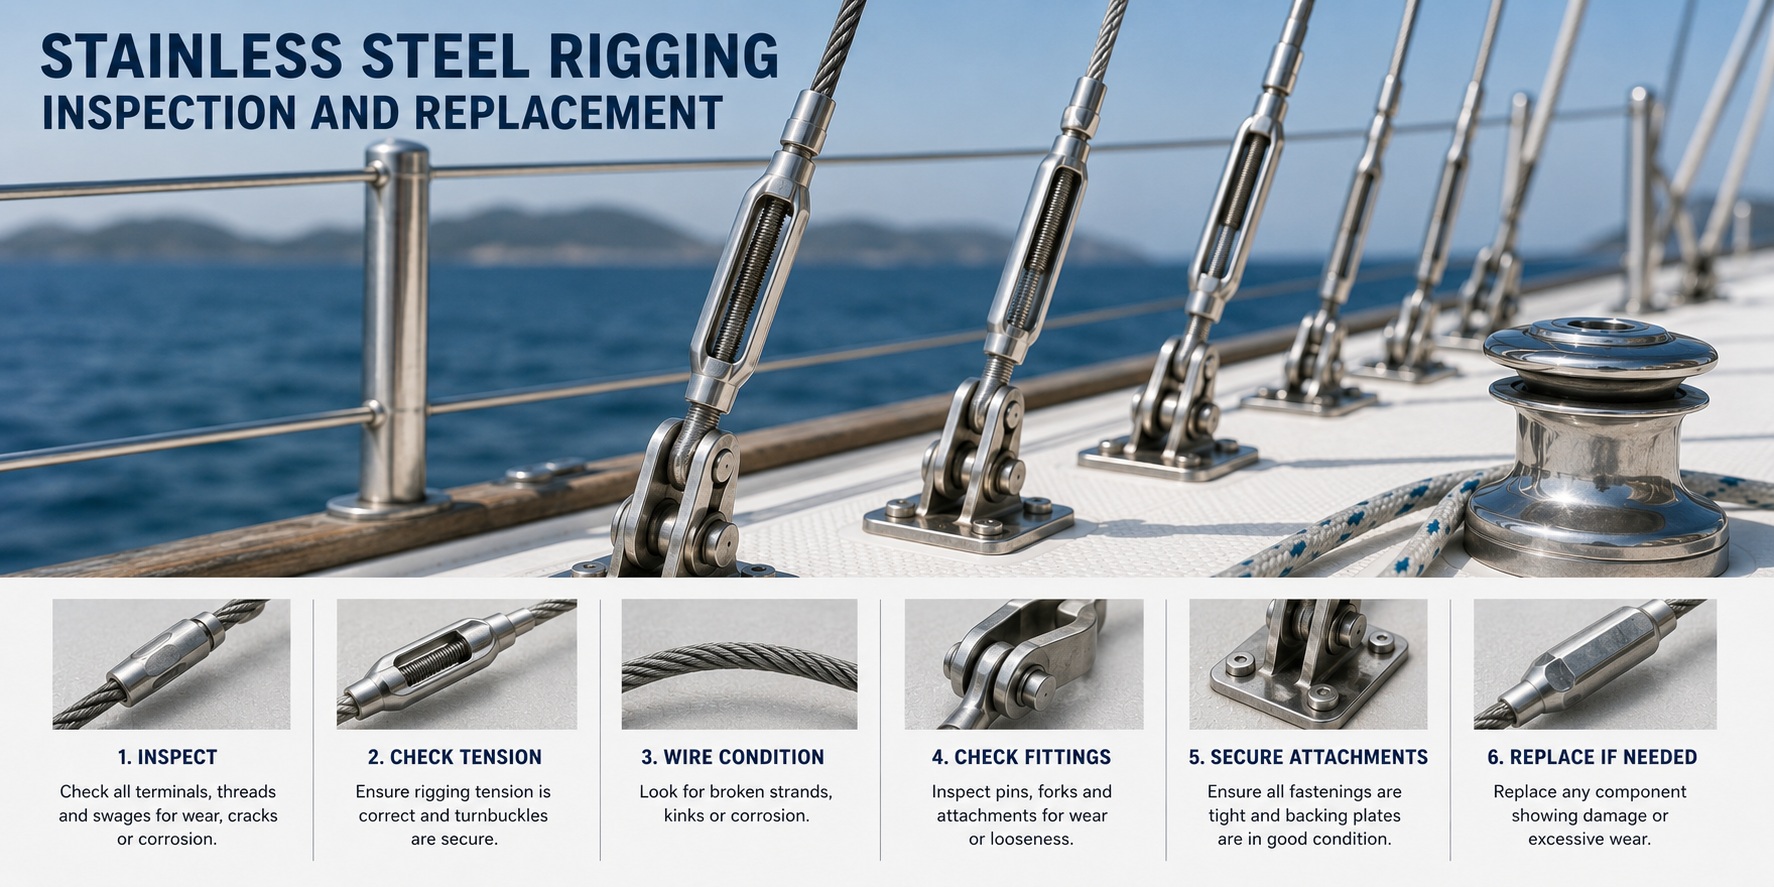
Yacht Stainless Steel Rigging Inspection and Replacement. Stainless steel standing rigging can retain a clean external appearance while fatigue or corrosion develops inside a terminal, chainplate penetration or concealed forestay assembly. Inspection must extend beyond looking for broken wire strands from deck level. The skipper must examine the complete load path, including wire exits, swages, mechanical terminals, turnbuckles, toggles, clevis pins, mast fittings, chainplates and the hull structure supporting them.
Rigging age is one factor in the replacement decision, but age alone does not establish condition. Service life is affected by sailing distance, rig tension, sea state, climate, mast movement, terminal alignment, racing loads, previous damage and inspection access. A lightly used rig can suffer crevice corrosion, while a heavily used offshore rig can accumulate fatigue without visible staining. Do not extend the life of standing rigging solely because it remains polished.
Yacht Stainless Steel Rigging Inspection and Replacement - Rigging Records
Create a standing-rigging register that identifies every primary stay and component. Record the following:
- Installation date. This establishes the known service period. Where the date is unknown, the remaining life cannot be assessed from records.
- Wire specification. Record manufacturer, material grade, strand construction and diameter so future replacement parts can be selected correctly.
- Terminal types. Identify swages, mechanical terminals, T-terminals, stemballs, eyes and forks.
- Turnbuckles and toggles. Record thread sizes, pin diameters and part types.
- Inspection history. Include professional inspections, mast removals and any components opened or dismantled.
- Rigging incidents. Record groundings, accidental gybes, mast strikes, severe knockdowns and other events that may have shock-loaded the rig.
- Tension changes. Repeated adjustment can indicate movement in the rigging or supporting structure.
- Photograph each terminal and chainplate. Later photographs can then be compared with the original condition.
Yacht Stainless
Steel Rigging Inspection and Replacement - Inspection Frequency
Inspect the rig before an offshore passage and as part of routine yacht maintenance. Carry out an additional inspection after: and of the following events:
- Heavy-weather sailing. Repeated pitching, rolling and sail shock loads can accelerate fatigue at terminals.
- An accidental gybe. The boom, backstay, shrouds and mast fittings may have received a rapid load increase.
- Grounding. A sudden stop can load the mast and rigging even where the mast did not visibly move.
- Mast or rig contact. Contact with a bridge, crane, tree or another vessel can bend wire, spread terminal jaws or damage mast fittings.
- A furling-system seizure. Excessive force used to furl or unfurl can apply torsion and bending to the forestay.
- Unexplained loss of rig tension. This can indicate turnbuckle movement, wire damage, chainplate movement or mast-step settlement.
- Chainplate leakage. Water entry can damage both the stainless plate and the supporting bulkhead or laminate.
Do not wait for the next annual survey when the rig has experienced an abnormal load.
Yacht Stainless Steel Rigging Inspection and Replacement - Deck-Level Inspection
Begin at each chainplate and work upward. Inspect the following:
- Turnbuckle locking. Locking wire, split pins or locking nuts must remain secure. A body that has rotated changes rig tension and thread engagement.
- Visible thread engagement. There must be enough stud inside the body to meet the manufacturer’s minimum requirement.
- Clevis-pin condition. Pins must remain round, straight and free from wear grooves.
- Toggle movement. The fitting must articulate without binding against the chainplate or deck.
- Terminal alignment. The stud, turnbuckle and wire must lie in the direction of the stay load.
- Rust staining. Determine whether the stain is surface contamination or is emerging from inside a fitting.
- Chainplate movement. The plate must not lift, twist or open gaps in the deck when the rig is loaded.
Use a strong light and magnification. Clean salt and dirt before deciding that a surface is undamaged.
Yacht Stainless
Steel Rigging Inspection and Replacement - Aloft Inspection
A complete inspection requires access to mast terminals, spreaders and upper wire sections. Examine the following:
- Masthead fittings. Look for cracked tangs, worn sockets, loose pins and corrosion around fasteners.
- T-terminals. Confirm that they remain fully seated and have not enlarged or cracked the mast slots.
- Stemballs. Check that the ball remains seated and can align inside its socket.
- Spreader tips. Confirm that the shroud remains correctly located and is not bearing against a sharp edge.
- Intermediate attachments. Inspect tangs, rivets, bolts and the surrounding mast wall.
- Wire exits. Look for broken strands or local bending immediately below each terminal.
- Sail and halyard contact. Repeated rubbing can polish, abrade or bend the wire.
Binoculars can identify gross defects, but close access is required to inspect small cracks and hidden surfaces.
Yacht Stainless
Steel Rigging Inspection and Replacement - Wire-Strand Inspection
Wear gloves and pass a cloth carefully along the wire. A broken strand can catch the fabric before it is easily visible. Look for the following defects:
- Broken outer wires. A projecting strand indicates that the cable has suffered fatigue or mechanical damage. Do not cut the strand off and continue normal sailing.
- Local distortion. A section that is no longer round may have been crushed by a clamp, crane sling or fitting.
- A kink. A sharp permanent bend disturbs strand loading and requires replacement.
- Abrasion. Flattened or polished wires show that the stay has been rubbing against another component.
- Pitting. Small cavities remove metal and create fatigue points.
- Strand separation. Gaps between wires can indicate torsion, crushing or loss of cable integrity.
- Diameter change. A locally reduced section indicates wear or corrosion.
Any broken strand requires investigation of the cause and condition of the complete stay.
Yacht Stainless
Steel Rigging Inspection and Replacement - Kinked Wire
A kink is a permanent local bend that disrupts the original strand pattern. It can occur during mast stepping, transport, coiling, storage or mishandling of a furling foil. A kinked wire may appear straighter after being pulled under tension, but the inner and outer strands no longer share the load evenly. Do not hammer, bend or pull a kink straight and return the stay to service. Replace the affected cable.
Yacht Stainless
Steel Rigging Inspection and Replacement - Swage-Terminal Inspection
Inspect the entire swage and the wire immediately above it. Look for the following evidence:
- Rust emerging from the terminal mouth. This can indicate water and corrosion inside the swage.
- Longitudinal cracking. A crack running along the terminal body can result from faulty swaging, corrosion or overload.
- Bulging. A local increase in diameter suggests that the terminal has deformed or that internal corrosion products are forcing the metal outward.
- Distortion. A curved or flattened swage indicates bending or crushing.
- Wire movement. A visible gap or changing wire position can indicate loss of grip.
- Broken strands at the exit. This is a common fatigue location because the rigid terminal meets the flexible wire.
- Bending at the mouth. A wire leaving the terminal at an angle shows inadequate articulation.
A cracked or visibly distorted swage must be removed from service.
Yacht Stainless
Steel Rigging Inspection and Replacement - Lower Swages
Lower swages receive deck wash, salt spray and water retained by covers. Remove boots, tape and protective sleeves during inspection. Check the underside and hidden face of the terminal. A stain visible only after the cover is removed can identify retained moisture. Ensure water can drain away. Do not refit a boot that forms a sealed cup around the terminal.
Yacht Stainless Steel Rigging Inspection and Replacement - Upper Swages
Upper swages are exposed to mast movement and terminal misalignment. Where possible, inspect them with the stay unloaded. A small crack can remain closed while the component is under tension. Check whether the mast fitting allows the terminal to move. A seized tang or toggle causes the wire to bend at the swage exit during every load cycle.
Yacht Stainless Steel Rigging Inspection and Replacement - Mechanical-Terminal Inspection
A mechanical terminal may be dismantled where the manufacturer permits. Before opening it perform the following:
- Support the mast with a halyard or temporary stay.
- Remove all load from the component.
- Mark the terminal and wire position.
- Obtain the correct assembly instructions.
- Prepare any replacement cones, wedges or approved sealants required for reassembly.
- Inspect the outer strands where they bear around the cone. Broken, crossed, crushed or corroded strands indicate that the terminal cannot simply be reassembled.
- Check the body threads for galling and the internal cone for deformation.
Do not reuse internal parts unless the manufacturer permits reuse and their condition can be verified.
Yacht Stainless
Steel Rigging Inspection and Replacement - Turnbuckle Inspection
Inspect the body, studs, threads, forks, eyes and locking system. Specific defects include the following:
- Galling. The threads feel rough, seize or show torn metal. The component must be unloaded before further adjustment.
- Bent studs. A stud that does not share the centreline of the body has been side loaded and requires replacement.
- Cracked bodies. Cracks near the threaded ends or open-body frame indicate structural failure.
- Insufficient thread engagement. Too much exposed thread means there may be too little stud inside the body.
- Unequal movement. A large change at one end can indicate that one stud is seized while the other is turning.
- Elongated pin holes. An oval hole allows the clevis pin to move and concentrates bearing load.
- Loose locking. A turnbuckle that can rotate can alter rig tension during normal vibration.
Do not force a seized turnbuckle while the rig remains loaded
Yacht Stainless
Steel Rigging Inspection and Replacement - Materially Worn Pins and Turnbuckles
Material wear means that enough metal has been lost to alter how the component carries load. A pin is materially worn when it has a visible groove, flattened bearing surface, reduced diameter, bending or pitting. A turnbuckle is materially worn when the threads have become loose, the pin holes are elongated, the forks have spread, the body is distorted or the studs no longer remain straight. The component must be replaced when the following occurs:
- The pin can move sideways inside the connected fitting.
- The bearing surface no longer contacts evenly.
- A groove is clearly visible or can be felt with a fingernail.
- The hole has changed from round to oval.
- The threads contain torn or missing metal.
- The fork legs are no longer parallel.
Do not rotate a worn pin or reverse a worn fitting to place an unworn surface under load.
Yacht Stainless
Steel Rigging Inspection and Replacement - Clevis Pins and Retainers
Remove accessible clevis pins during a major inspection. Inspect each pin for wear grooves, bending, corrosion, pitting and damage to the retaining hole. Inspect the connected fork, eye or chainplate for an elongated hole. Replacing only the pin does not correct a worn terminal hole. Replace split pins each time they are removed if they have been bent repeatedly. Replace locking rings that are stretched, corroded or partly open.
Yacht Stainless
Steel Rigging Inspection and Replacement - Toggle Inspection
A toggle must move through the range required by the stay. Inspect the following:
- Jaw spreading. The two fork legs must remain parallel. Outward bending indicates side loading or an incorrect connected fitting.
- Pin wear. A groove reduces the load-bearing section.
- Hole ovality. The hole must remain round. An oval shape shows repeated movement under load.
- Restricted articulation. The toggle must not bind against the deck, chainplate or turnbuckle.
- Uneven contact marks. Bright wear on one side only identifies misalignment.
Do not bend spread jaws back into shape and reuse the toggle.
Yacht Stainless
Steel Rigging Inspection and Replacement - T-Terminal Inspection
Confirm that each T-terminal is fully seated in its mast slot. Inspect the slot for cracking, wear, corrosion and elongation. A worn slot may allow the terminal to move or bear on one edge. This transfers load unevenly into the mast wall. Where the mast is down, remove the terminal and inspect both the fitting and concealed backing component.
Yacht Stainless
Steel Rigging Inspection and Replacement - Stemball Inspection
Inspect the ball and socket for wear, corrosion and cracking. The ball must align freely. A seized ball forces the wire to flex immediately below the terminal. Bright wear on one edge of the socket shows that the ball is not bearing evenly. Do not fit a replacement ball to an unidentified socket without confirming compatibility.
Yacht Stainless
Steel Rigging Inspection and Replacement - Spreader Inspection
Spreaders control shroud geometry and transfer compression into the mast. Inspect the following:
- Spreader-root movement. The inboard end must not move relative to the mast. Movement can indicate loose fasteners, worn fittings or cracking.
- Root cracking. Examine welds, brackets and surrounding mast material for fine cracks.
- Outboard-tip wear. The shroud groove must remain smooth and must not cut or pinch the wire.
- Shroud retainers. Retaining wires or caps must hold the shroud in position without crushing it.
- Spreader angle. A spreader that has drooped or rotated changes the shroud lead and mast support geometry.
- Corrosion. Dissimilar metals and retained salt can damage spreader fittings and fasteners.
A loose or displaced spreader requires correction before the rig is loaded.
Yacht Stainless
Steel Rigging Inspection and Replacement - Mast Tang Inspection
Mast tangs and backing fittings carry concentrated stay loads. Inspect pin holes for ovality and wear. Check welds, rivets, bolts and the surrounding mast wall for cracking or distortion. A tang that has bent away from the stay direction is carrying side load. Do not install a new stay onto a tang with an elongated hole, loose fastener or visible crack.
Yacht Stainless
Steel Rigging Inspection and Replacement - Chainplate Inspection
Inspect chainplates above and below deck. Look for evidence of the following:
- Failed sealant. A gap or crack permits water to enter around the plate.
- Rust or pitting below deck. Concealed corrosion can be more serious than surface staining above deck.
- Elongated pin holes. An oval hole shows movement and reduced bearing area.
- Loose bolts. Fasteners that turn, move or leak may no longer clamp the plate to the structure.
- Cracked welds. Weld cracks can begin at corners or abrupt changes in section.
- Wet timber. Dark, soft or crumbling timber indicates water damage around the chainplate support.
- Laminate separation. Cracks, hollow sounds or visible separation indicate that the composite support has lost integrity.
- Movement under load. The plate must not lift, twist or open a deck gap as rig tension changes.
Do not reseal the deck surface without investigating the concealed plate and support structure.
Yacht Stainless
Steel Rigging Inspection and Replacement - Roller-Furling Forestay Inspection
The forestay inside a furling foil is difficult to inspect directly. The inspection must address the following:
- The upper and lower terminals.
- The wire inside the foil.
- Foil connectors that may rub against the wire.
- Bearings that can seize and transfer torsion.
- The concealed turnbuckle and its locking.
- Toggles and pins at both ends.
A furler that turns freely does not confirm that the wire is free from fatigue or corrosion. Dismantle the system at the required inspection or replacement interval.
Your Complete Onboard DIY
Self Help Resource
Why not get a copy of my book The Marine and Electrical and Electronics Bible 4th Edition. In Australia order a copy through Boat Books. UK based boats can Order Here. US based boats can get the US edition Order Here. Marine systems are my profession so let me help you.


Yacht Stainless
Steel Rigging Inspection and Replacement - Backstay Adjusters
Inspect hydraulic and mechanical adjusters as part of the standing rig. Check the body, rod, forks, pins and wire terminals. A hydraulic adjuster that loses pressure can reduce backstay tension and may have a leaking seal or damaged cylinder. A mechanical adjuster with damaged threads or a seized screw can prevent controlled tension changes. Do not continue increasing pressure or force where the adjuster will not hold or move normally.
Yacht Stainless
Steel Rigging Inspection and Replacement - Cleaning Stainless Rigging
Wash the rig with fresh water to remove salt. Use non-contaminating cloths and brushes. Do not use carbon-steel wire brushes or ordinary steel wool because they can embed iron particles that later rust. Cleaning helps expose defects but does not restore metal lost through corrosion or wear. Do not polish a crack or pit until it is difficult to locate.
Yacht Stainless
Steel Rigging Inspection and Replacement - Dye-Penetrant Inspection
Dye-penetrant testing can reveal some surface-breaking cracks in clean, accessible metal. It cannot identify corrosion inside a swage, damage below a chainplate cover or flaws that do not reach the surface. The test must be applied and interpreted correctly. Use it as part of an inspection program rather than proof that the complete component is sound.
Yacht Stainless
Steel Rigging Inspection and Replacement - Rig-Tension Changes
Unexplained rig-tension loss requires investigation. Possible causes include some of the following defects:
- Turnbuckle rotation. Locking has failed and the body has unwound.
- Wire or terminal damage. A component may have deformed or begun to fail.
- Chainplate movement. The fitting or supporting structure may be moving under load.
- Mast-step compression. The mast support may have settled, reducing the distance between masthead and chainplates.
- Hull movement. Structural distortion can change rig geometry.
- Incorrect previous tuning. A shroud may have been left outside its proper working range.
Do not repeatedly retighten the rig without identifying the source of the change.
Yacht Stainless Steel Rigging Inspection and Replacement - Mast Step and Compression Structure
The mast step and compression structure form part of the rig load path. Inspect all of the following:
- The mast heel and step plate. Corrosion, distortion or movement can alter mast support.
- The compression post. Check for crushing, movement or separation from the deck beam.
- Timber supports. Softness, cracking or dark staining indicates water damage.
- Composite structures. Cracks, delamination or indentation can indicate compression failure.
- Bilge support. The lower end of the compression structure must remain supported by sound hull structure.
Do not correct mast-step settlement by applying more rig tension.
Yacht Stainless
Steel Rigging Inspection and Replacement - Replacement Intervals
No single replacement age applies to every yacht. Service life depends on offshore mileage, climate, rig loads, terminal alignment, corrosion exposure, racing use, previous damage and inspection access. Insurers may impose age-based requirements. On my boat it is 10 years. Obtain the actual requirement applying to the yacht. Replacement is required when condition cannot be verified, even where the calendar age appears acceptable.
Yacht Stainless
Steel Rigging Inspection and Replacement - Full Rerig or Partial Replacement
A complete rerig replaces all primary wires and normally includes assessment of terminals, turnbuckles, pins, mast fittings and chainplates. Partial replacement may be justified when one recent stay suffers isolated mechanical damage and the remaining rig has a documented service history and professional inspection. Do not replace one failed old stay and assume that components of the same age retain substantial life. They have normally experienced the same environment and load cycles.
Yacht Stainless
Steel Rigging Inspection and Replacement - Reusing Turnbuckles and Hardware
Reuse requires more than cleaning and polishing. A component is suitable for reuse only when any of the following apply:
- Its age and service history are known.
- Threads remain complete and free from galling.
- Pin holes remain round.
- Fork jaws remain parallel.
- Studs remain straight.
- No cracking or material loss is present.
- It remains compatible with the new wire and terminals.
- The manufacturer permits continued use.
Record every reused component. A new wire connected to old unverified hardware is not a completely renewed rig.
Yacht Stainless
Steel Rigging Inspection and Replacement - Offshore Emergency Rigging
Carry equipment capable of supporting the mast after a stay failure. Useful items include spare halyards, low-stretch line, mechanical wire terminals, suitable spare wire, shackles, toggles, clevis pins, lashing material and proper wire cutters. After a failure observe the following measures:
- Reduce sail immediately to lower mast and rig loads.
- Alter course where possible so the damaged side is not carrying the highest load.
- Support the mast with a halyard or temporary stay led to a structurally suitable deck point.
- Secure loose wire so it cannot damage the sails, mast or crew.
- Inspect adjacent terminals and chainplates for related damage.
- Proceed toward shelter under reduced sail.
Do not stand in line with a loaded damaged stay or temporary support.
Yacht Stainless
Steel Rigging Inspection and Replacement - Replacement Criteria
Replace a standing-rigging component when any of the following defects are observed:
- A wire strand is broken. This indicates fatigue or mechanical damage and means the remaining strands are carrying additional load.
- A terminal is cracked. Any structural crack shows that the component has begun to separate and cannot be returned to service.
- Structural corrosion is present. Pitting, crevice corrosion or section loss reduces strength and creates fatigue points.
- A stay is kinked. The strand arrangement has been permanently disturbed.
- A pin or turnbuckle is materially worn. Grooves, oval holes, thread loss, spread jaws or bent studs mean that the component no longer carries load as designed.
- The chainplate condition cannot be established. Concealed corrosion or structural damage cannot be accepted merely because the visible top remains polished.
- The service history is unknown. Without age, product and inspection records, remaining fatigue life cannot be quantified.
- The rig has experienced a significant overload. A grounding, mast strike or severe accidental gybe can damage components without immediate failure.
- The insurer requires replacement. Continued use outside policy requirements can affect cover. (My insurer says 10 years maximum)
- A professional inspection recommends retirement. Suspect components must not remain in service because they have not yet failed.
Survival of the previous passage does not establish remaining service life.
Yacht Stainless
Steel Rigging Inspection and Replacement - Summary
Stainless steel standing rigging requires inspection of the full structural system, not a visual check of the exposed wire. Broken strands, terminal staining, seized toggles, worn pins, concealed chainplate corrosion and recurring loss of rig tension all require action. No single replacement age applies to every yacht, but undocumented history, inaccessible components and accumulated fatigue reduce the skipper’s ability to establish continued safety. Maintain a rigging register, inspect after abnormal loads, open concealed areas and replace components when their condition cannot be verified. A polished wire surface is not evidence that the complete rig remains structurally sound. Yacht Stainless Steel Rigging Inspection and Replacement for all you need to know.